This time, we’re going to talk about How To Polish Epoxy Table Top. There is a lot of information about how to clean resin table top on the internet, of course. Social media are getting better and better quickly, which makes it easier for us to learn new things.
Epoxy Sanding and Wax Epoxy Resin are also linked to information about How to Polish Epoxy Resin. As for other things that need to be looked up, they are about How To Protect Epoxy Table Top and have something to do with Uv Resin Polish.
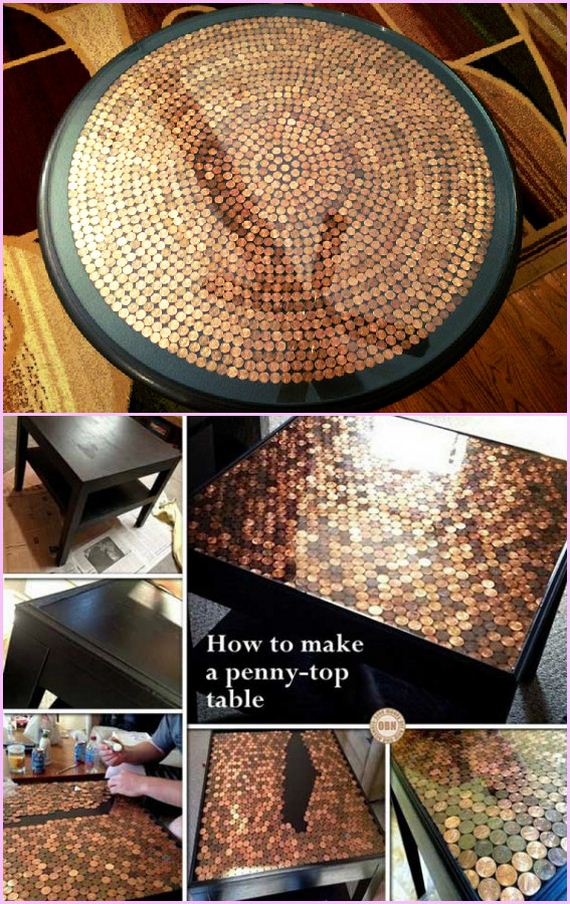
63 Interesting Facts How To Polish Epoxy Table Top | How To Get Stains Out Of Epoxy Countertop
- Remember, when using an electric buffer, there are two different types of attachments–a polishing attachment and a wax attachment. Be sure to use the correct polishing pad as a waxing pad won’t make the abrasive contact needed. Remember, most polishing paste products have some type of pumice stone built into them, and waxing pads are too soft for the job. - Source: Internet
- Epoxy resin, although an extremely versatile material that once cured is also durable, is a highly sensitive material during the curing process. Thus, it is very important to select a resin of premium quality so that you can ensure a perfect finish once the resin has cured. You will require both a casting resin for creating the river table, as well as a laminating resin to provide a final coat over your tabletop. We have selected two of the leading products in each category to help you choose the best epoxy for your river table. - Source: Internet
- All cracks, porous and uneven areas in the wood should be filled with epoxy resin. Use crystal clear resin without pigment. If the irregularities are on the edges, you can seal the edges with a stable adhesive tape before sealing, so that the resin does not run off over the edges. When the filled cracks and the like are completely cured, you should seal all the wood with resin. - Source: Internet
- Note that if the epoxy cured clear, but it’s on a table top that sits in direct sunlight, the UV exposure can make the epoxy turn yellow. Prevent yellowing by coating the cured epoxy surface with a clear UV-stable varnish. Check here for how to make epoxy UV stable. - Source: Internet
- Large areas can be polished to a high gloss most quickly with a polishing machine. A random orbit sander with polishing attachment is the first choice for epoxy resin surfaces. Due to its eccentric movement, you will achieve a perfect polishing result without removing too much resin. To do this, apply some polishing paste to the polishing pad on your sander. Turn the machine on and move it in circular movements with little pressure over the surface until the desired gloss level is achieved. - Source: Internet
- Hopefully you have enjoyed learning how to make epoxy resin tables and you are able to effectively make your own DIY table. If you would like to read more articles about epoxy resin in combination with wood? Then you might also be interested in the following blog post: Epoxy Resin for Wood. We have also created a web story to wrap up the most important steps. - Source: Internet
- For small pieces like jewelry, I recommend using a buff motor if you are able to purchase one or use one from a local shop. This will help you have more control over the fine details of the piece, without having to guess where your polisher is working. For larger pieces, you can use a handheld buffer or polisher. - Source: Internet
- Fortunately, polishing epoxy resin with a polishing compound is not overly complicated. Still, you will want to adhere to the directions below to achieve your desired result. Here are the steps to get your epoxy project finished and ready to show the world. - Source: Internet
- Basically, you need wooden planks and Epoxy Resin to make a River Table yourself. You build a mold, where you place thw wood and fill the space between with Resin. After the hardening process, you unmold the tabletop, sand and polish the surface and mount the table legs. - Source: Internet
- There is so much no learn about epoxy resins. Our best advice is to hop on Youtube and view as many different videos as possible specific to your project. For example, if you’re making an epoxy-coated table, search ‘how to epoxy tabletop’, and you’ll be sure to find many different videos to spark your interest. - Source: Internet
- Bar and table top epoxy resins generally take 72 hours to cure. The important point to be noted, however, is that at this time, the epoxy is 99.5% cured – not 100%. It can take a couple of months for the epoxy to fully cure. During this time, you should avoid placing hot items directly on the epoxy surface, as they might leave an imprint on the surface. - Source: Internet
- On the other hand, you should not expose the table top epoxy to temperatures higher than 135ºF. For example, this means you should not place a hot frying pan or a skillet directly on the table. Exposure to extreme heat can soften the epoxy and affect its durability. - Source: Internet
- Tip: Do not store the epoxy resin on the floor as the floor is always colder than the room. Even if you have the perfect temperature of around 20 C degrees, the floor will not be more than 15 C to 17 C degrees. If the resin is too cold, tiny bubbles will form which you can hardly get out of the resin, not even with a heat gun. - Source: Internet
- If you need to use something stronger than soap, you can use a diluted solution of bleach or alcohol. It’s not prudent to apply bleach or alcohol directly on the epoxy surface. Make sure you wear gloves while cleaning your table top, as bleach can irritate and burn your skin. - Source: Internet
- The best thing to do is sand the surface with 220-grit sandpaper to remove the swirls or streaks. Remove the sanding residue, wipe the surface with denatured alcohol and let it dry completely. Apply a flood coat of mixed table top epoxy and you’re all set – no more streaks or swirls! - Source: Internet
- It is best to apply the oil evenly with a soft cloth onto the entire tabletop. Before you oil the tabletop, however, you should polish it – especially the resin River – with a polishing machine and polishing paste. This is to remove any traces of sanding and to achieve a silky surface. - Source: Internet
- So, it is better to use coasters and placemats until the epoxy is fully cured. Moreover, when you clean the epoxy table tops, avoid the use of abrasive cleaners, which will dull the shine after some time. Also, do not use polishes that have wax as one of the main ingredients. - Source: Internet
- One of the most important parts of polishing your resin project is going to be the compound you choose to go with. A lot of table and charcuterie makers will opt for oils like Walrus Oil or Odie’s Oil. These are great when working with a project that is primarily wood, or will have a lot of potential contact with food as these are natural and non-toxic in any way. When working with something that is mostly epoxy, and needs that glasslike finish, you will want to use a specialized polishing compound- usually used on cars, but in this case, made safe to use on your epoxy resin projects. - Source: Internet
- Porous surfaces like wood and concrete can emit moisture, which can cause an improper bond. Make sure the wood or concrete surface is completely dry, especially if using a large slab of concrete. This is because the table top epoxy may initially form a strong bond, but if the concrete emits a lot of moisture, the moisture can become trapped, which could cause delamination in areas. - Source: Internet
- If the wood was dry, the cloudy finish could’ve also been caused by high humidity. Excess moisture in the air can react with the mixed epoxy and turn it cloudy. Be sure the temperature in your work area is 70-80°F and the relative humidity is 0-90%. - Source: Internet
- This epoxy resin is formulated with top-grade UV resistance, making it far less likely to fade or become yellow over time. You are likely to incorporate color to this resin if you are creating a river table, which you will be able to do with ease. This resin can be mixed with color pigments such as mica powders, liquid dyes, and alcohol inks. However, you should not use paint with this resin, especially acrylic- and oil-based paints. - Source: Internet
- How to remove bubbles from table top epoxy – Use a heat gun on its lowest setting. Wave it quickly back and forth a few inches above the surface, taking care not to get too close and scorch the surface. Bubbles will rise to the surface and pop, leaving the epoxy smooth and bubble-free. - Source: Internet
- To avoid damage to your epoxy resin table, always use a hot pad underneath hot dishes, pans, or pots that you want to place on the table. This is because the heat can cause damage to the epoxy (i.e., it can start to melt). - Source: Internet
- How to prevent exotherm – Don’t exceed the maximum pour depth, which is typically 1/8” to ¼” per layer for table top epoxy systems. Mix only as much epoxy as you need for the layer you are pouring. Make sure the temperature in your work area doesn’t exceed 80°F. Mix the epoxy in wider, round-bottom containers, rather than taller containers, and pour and spread the epoxy immediately after mixing thoroughly. - Source: Internet
- The first step to polishing an epoxy resin project is to sand it down. This could be done in a variety of ways depending on what the project is. Of course, sanding down a large epoxy resin table is going to look different than how you would sand a smaller piece like a craftsman pen that has been designed with an epoxy resin handle. - Source: Internet
- Caring for your crystal clear resin table is easy to do if you know the proper steps to follow. Hopefully, this guide has helped you understand what needs to be done to extend the life of your epoxy resin table and repair it if you need to. Remember to wipe down the table top regularly, use a polishing compound when you need extra shine, and keep your epoxy wood table out of prolonged sun exposure and it will continue to look its best. - Source: Internet
- This resin is less likely to shrink, produces very little odor, and emits no volatile organic compounds (VOCs) whatsoever. Most epoxy resins will develop a yellow hue over time, although this is less obvious in colored pieces. This product is built with specialized UV inhibitors that will help to prevent your resin from yellowing. To add color, mica pigment powders will mix particularly well with this resin. You should never mix your epoxy with or pour it over an oil-based product. - Source: Internet
- Also, think about how your epoxy resin table may be coated in waterproof resin, but the base may not be. The base could even be made from metal, which can rust over time. So, you also need to check the hardware of your epoxy resin table regularly because a loose table can result in damage and accidents. Always make sure that the hardware is secure and rust-free. - Source: Internet
- Once your epoxy river table has been cast and cured, it is in your best interest to apply a final transparent coating to your tabletop as a protective layer. This will seal the epoxy and increase its durability. We suggest choosing a UV-resistant top coat so as to prevent this clear layer from yellowing over time. - Source: Internet
- Epoxy coatings are becoming more and more popular these days for tables, bar tops, works of art, and many other things. In addition to their durability, resilience and clarity, epoxy coatings can also be buffed to remove imperfections, small scratches, or just to increase the shine by performing a few basic steps. The components needed to perform this are dependent on the condition of the surface. - Source: Internet
- Before you can apply a finish on your resin tabletop, you should polish the epoxy resin. This will help to get rid of the little scratches you have in your epoxy because of the sanding process. For bigger surfaces like tabletops, we recommend that you use a buffing machine for the best result. For smaller projects, you also could use a towel and polishing compound to polish it by hand. Here are our top suggestions for this job! - Source: Internet
- Finally, now that you have gathered your materials and are ready to begin polishing your epoxy resin project, it is time to choose a polishing method. When polishing, you can do so by hand or with a buffing machine of some sort. Still, you want to make sure that you are using a polishing method that is most appropriate for your level of comfort as well as the unique dimensions of the project that you are planning to work with. - Source: Internet
- Polishing resin with a polishing compound is the most common method for most applications. This is likely used on jewelry, games, cutting/serving/charcuterie boards, butcher blocks, furniture, dining room tables, river tables, and desks. This method is great because it can leave the wood looking and feeling like wood while making epoxy shine like glass. - Source: Internet
- Above all, the Epoxy River Tables create a very exciting contrast through the combination of wood and mostly dyed resin and are therefore extremely appealing for most people. The special thing about these pieces of furniture made of wood and resin, however, is that they cannot be assigned to any style direction and appeal to very different furnishing styles. Both lovers of wood furniture and people who prefer the modern style are equally addressed by this type of epoxy river table. - Source: Internet
- The Stone Coat brand produces a quality epoxy product that can be described as “liquid glass”. Stone Coat has been manufacturing epoxy resin for more than half a century, which means that you can guarantee a quality product when selecting this brand. This deep pour epoxy resin can be poured to depths of 2 inches, making it ideal for creating a river table that requires deep pouring. The resin will cure to be hard and durable, resistant to heat, and is unlikely to shrink. The thinner viscosity of this resin also means that you will encounter fewer bubbles. - Source: Internet
- Epoxy resin is known for its extraordinary durability and its ability to protect surfaces against scratches and stains. With proper maintenance, an epoxy coating can last for years and keep your tabletop and bar top surfaces in excellent condition. Below are three tips that can help you maintain your table top epoxy and increase its lifespan. - Source: Internet
- You also want to be sure to keep the temperature in your work area between 70-80°F to apply AND cure the epoxy. If the temperature fluctuates, you can get dimples or ripples, and the epoxy might not cure completely. Dust can also cause small pits or dimples, so try to make your work area as dust-free as possible. - Source: Internet
- You can also use cross-cut tree slices as a resin table. The wood must be dried very well here as well. Glue the top and bottom of the disc well and fill the cracks 1-2 times. Then you can seal the tree disc with epoxy resin and mount the legs. - Source: Internet
- Still, the most common way to sand epoxy resin is to use waterproof sandpaper. Wet sanding has a lot of advantages when working with epoxy resin that dry sandpaper does not. The primary advantages include the following. - Source: Internet
- The reason for this is epoxy is not porous, and sanding up to 1200-3000 grit causes oils and waxes to have a hard time penetrating the sanded area. You will need something that is able to penetrate a high-grit sanded epoxy. Here are a couple of great options, although there are many more if you explore. - Source: Internet
- Always start out using soap and water to wipe away most stains and spots on your epoxy resin table. You can also use gentle spray cleaners, such as a glass cleaner to get a shiny, streak-free, and spotlessly clean surface. If you notice that your table looks a bit dull, you can use mineral oil and buff it with a dry towel to make it shine again. - Source: Internet
- Pour the first layer of crystal clear resin into the epoxy resin quickly but carefully, and then briefly apply the epoxy resin with a heat gun. Never heat the resin in one place for more than 3 seconds, as this can lead to steaming or burning of the resin and the end result may be a yellowish epoxy. The second casting takes place in the so-called “B Stage”. At this point, the first layer is not yet completely cured and still sticks. If you lightly touch it with the glove, the resin should no longer be liquid, but should feel as if you are touching the inside of an adhesive tape. - Source: Internet
- You can opt to use your epoxy resin table outdoors, but you need to be extremely careful. When your table is outdoors, you need to use shade, such as umbrellas, to help keep as much sun off the table as you can. You should also alternate which epoxy resin table is outside to limit UV exposure. - Source: Internet
- The water that is on the surface when sanding catches and saturates the dust particles that would usually be free to float in the air. Epoxy can be a dangerous substance to the human body, particularly if ingested. Wet sanding greatly reduces the risk of epoxy particles being inhaled and ingested while sanding your project down. - Source: Internet
- If you would like to polish with a machine, for small workpieces I recommend a drill on which you screw a polishing attachment. There are attachments with polishing sponges or polishing discs and special polishing ball heads. The best polishing compounds are those that are also intended for wood. - Source: Internet
- If the cured epoxy looks dirty, not crystal clear, the cause could be dirt or dust that contaminated the epoxy somehow. Using dirty mixing cups or mixing sticks can do it. So can forgetting to tighten the resin and hardener caps before storage. - Source: Internet
- This tabletop epoxy provides a premium product that will cure to a finish that is shiny, as clear as crystal, and durable against the elements and other forms of damage. The application process is easy when using this resin, as it has a simple 1:1 mixing ratio and will level itself out automatically once poured. Your finish will be resistant to impact, blemishes, water, and other forms of damage once it has cured completely. This product has a quicker curing time than most, as your resin will have cured entirely after a period of 48 hours. - Source: Internet
- 3M is quickly becoming, if not already, the top polishing compound for epoxy resin projects. It comes in 3 parts, and each one builds on the next to create the perfect look. It is commonly used on boats, cars, and resin. Personally, this is all I have been using over the last year and plan to continue to do so (though I will test out others as they are recommended to me). - Source: Internet
- You will require a deep pour epoxy resin of a low viscosity when casting the tabletop. The resin must be fluid enough that it can be poured into the mold with ease. Using casting resin will ensure that all small gaps and hard-to-reach areas are covered. The following resins are sold as clear liquid components, so you will need to add your own color pigment to create the river table effect. - Source: Internet
- Don’t jump the gun–make sure your project has cured (dried) according to manufacturer specifications. The simplest way to know whether or not your epoxy is fully cured is by touch–is the epoxy glue still wet? If so, you’ll need to wait until it dries. Another method for testing whether or not the epoxy is cured is a stress test. - Source: Internet
- Use the exact mix ratio (typically 1 part resin to 1 part hardener for table top epoxy systems), whether measuring by weight or by volume. Too much hardener in epoxy resin will not make the epoxy cure faster. It will do just the opposite and make the epoxy not cure at all. - Source: Internet
- When polishing, you don’t want to move the electric buffer around too much. Focus on small areas, and look critically at how they change compared to the unbuffed area. Circular motions are always better, and try to accurately run the buffer down the edges of the project for the best results. - Source: Internet
- Meguiar’s PlastX is one of the most common polishing compounds for epoxy resin. It is usually used on cars, which are sanded to similar grits. This allows the epoxy to become ultra-smooth and resistant to scratching, while really allowing any color to pop. - Source: Internet
- If you want to polish your surface by hand, you will again need the sandpaper, sanding block, polishing paste, water and a cotton or linen cloth. Then put some polishing paste on the cloth and moisten it with some water. Then place the cloth over the sanding block. Rub the cloth over the surface in slow, circular movements with little pressure. Your polish is finished when the desired degree of gloss is achieved. - Source: Internet
- People like to cover paper in epoxy to get that cool, high-gloss finish. Collage, montage, decoupage – they can all include different types of paper. Problem is, porous paper will soak up epoxy. For this reason, paper types such as drawing paper, origami paper, card stock, watercolor paper, and book pages should be coated first to create a barrier that seals and protects. - Source: Internet
- Surface prep is the most important part of your epoxy project/resin piece. The smoother the project is sanded, the better the epoxy will adhere to the surface. Treat your epoxy jobs much like a paint job–you want to sand with something like 120-grit sandpaper to yield good results. - Source: Internet
- Yes, you can wash cured epoxy resin. Functional pieces like resin coasters and serving trays can easily get dirty during use. Since cured epoxy resin is waterproof, you can wash them with a soft cloth and a little mild dish soap without fear of damaging them. - Source: Internet
- This brand of deep pour epoxy resin can be used by beginners and professionals alike. You will find detailed instructions included with your resin kit to help guide you through the process. This resin will cure to be as clear as crystal, and if adding color, you will be left with a translucent colored finish that is reminiscent of glass. Where most other resins need to be applied in thin layers, this epoxy resin can be poured into a layer that is as thick as 2 inches. You can expect a slow curing period due to a low exothermic rate, meaning that the resin does not produce as much heat while curing. - Source: Internet
- The application process is the next most important part of the project. Reading the directions carefully when creating epoxy resin surfaces is vital. For example, if you mix too little or too much hardener into the batch, you could ruin the whole job. - Source: Internet
- Although the bark on the wood always looks very attractive, it must always be thoroughly removed . Then you should sand the edges thoroughly by hand. This will allow the epoxy resin to bond better with the wood later. Use a chisel or similar to carefully remove the bark. - Source: Internet
- In this tutorial, I will show you step by step how you can make a stunning and exclusive epoxy resin table from wood yourself. With the right technique, this isn’t as difficult as it might seem at first. I will show you exactly and in detail how this works and I will tell you some valuable professional tips. A well-done table is of course only possible with the right material and equipment. That’s why you’ll also find a list of what you need to make an Epoxy River Table. - Source: Internet
- Whether you are going to do this by hand or with machines, the process largely varies by preference and project. To make it simpler, I have listed out the general flow of polishing epoxy resin in order to achieve a glasslike finish for your project. Using this information, you can jump into polishing your epoxy resin and getting that “pop” you were going for. Let’s take a closer look. - Source: Internet
- Tabletop epoxy has been known to scratch easily and can also stain easily, similar to other materials like quartz. You may also find that some epoxy surfaces can become discolored over time. However, it also has a high corrosion resistance as long as you are careful and follow through with proper care and maintenance. - Source: Internet
 Here are a few tips to help you find information about What Do You Clean Epoxy With:
- Look for good places to get information about Resin Polish Epoxy Table Top, Height Epoxy River Coffee Table, Made To Order Handmade Wood Working Conference Room Table,Resin Dining Table. This can be done in libraries, on websites, or even by paid journalists.
- When looking for information about Epoxy Sanding, it's important to know that there are different kinds of online sources, like Google and YouTube. Social media sites like Facebook and Twitter are also good places to look for information about Epoxy Wood Table.
Here are a few tips to help you find information about What Do You Clean Epoxy With:
- Look for good places to get information about Resin Polish Epoxy Table Top, Height Epoxy River Coffee Table, Made To Order Handmade Wood Working Conference Room Table,Resin Dining Table. This can be done in libraries, on websites, or even by paid journalists.
- When looking for information about Epoxy Sanding, it's important to know that there are different kinds of online sources, like Google and YouTube. Social media sites like Facebook and Twitter are also good places to look for information about Epoxy Wood Table.Video | How To Polish Epoxy Table Top
To get the best information about Epoxy Sanding, you should read to find out how true each source is.
This article has a few videos from different places about What Do You Clean Epoxy With that will help you learn more about it. The Internet is a great place to find out about a wide range of things.
## Here are some crucial points concerning Polish Epoxy Resin:- How To Polish Epoxy Table Top
- How To Clean Epoxy Table Top
- How To Polish Resin Table Top
- How To Polish Epoxy Resin Table Top
- How To Clean Resin Table Top

With so many websites and forums that talk about Epoxy Wood Table, it shouldn’t be hard to find what you need.
Most people are used to getting information about Resin Polish in a very different way than this. It lets you look at the information about how to clean epoxy countertops and how it can be used in more detail.
 ways to put information about Care Instructions for Your Epoxy Resin Table in a way that looks good and is useful. They can be used in business and marketing, and they can also be used to talk about Coating Resin. So, we also give you some pictures about how to clean epoxy resin table top.
In the end, this article gives a summary of Wax Epoxy Resin. Also talked about are Resin Bubbles and Epoxy Table Sanding, which you can use to compare how much you know about how to polish epoxy table top.
