Today’s topic is Plans For Building A Buffet Cabinet. Obviously, you can find a great deal of Buffet Table Design For Home-related content online. The proliferation of online platforms has streamlined our access to information.
There is a connection between the Outdoor Buffet Table Plans and Sideboard Plans Woodworking Free information. additional searching needs to be done for Buffet Table Design For Home, which will also be related to Simple Buffet Table Design.
17 Things About Plans For Building A Buffet Cabinet | Buffet Blueprints
- Make this wonderful Large Hutch and Buffet for your dining room or kitchen. The 42" high China Hutch has four glass doors and was designed specifically to fit on the top of the Buffet. It can, however, be used with any buffet of 54" or more in length. The dentil molding on the cornice provides a unique richness. The finished upper portion hutch is 12-3/16" deep. - Source: Internet
- We started by searching for stock cabinets we could use as the base to save us from building that piece ourselves. We searched for stock options before we built the bump-out so that we didn’t need custom dimensions. 30″ is a very common cabinet width and that left us 6′ in the center for the mantel. We didn’t have the mantel yet, but we’d seen a lot of vintage mantels over the years that were less than 6′, so we were confident we could find it. Thank goodness we did! - Source: Internet
- Apply wood glue to the backside of each Back Supports. Place the ¼-inch plywood Back Panel onto the Supports. The edges of the plywood should set inside the walls of the cabinet, and be hidden from view. Using a pneumatic nail gun and 1¼-inch inch finish nails, attach the Back by nailing though the plywood and into each of the Supports. - Source: Internet
- Lay the assembled cabinet on its back, and then rest the Drawer Fronts and Doors in place. To keeps the parts from shifting, clamp the Drawer Fronts flush with the surface and ends of the Top Board using bar clamps. Position and adjust the Doors below. Jenn’s Tip: Use 1/8-inch tile spacers as placeholders for the necessary expansion gaps between the Doors and Drawer Fronts. - Source: Internet
- Apply wood glue to the front of each Drawer. Position the Drawer Fronts, and then lightly clamp them in place. Allow glue to dry completely before lifting the cabinet upright. Using a pneumatic nail gun and 1½-inch finish nails, nail through the Drawer and into the Drawer Front to hold the pieces securely in place. - Source: Internet
- Dry fit the cabinet fronts and doors; once the cabinet is complete, lay it on its back and then set the drawer and door fronts into place. Bar clamps are used to secure the Drawer Fronts to the Top Board’s face and the board’s ends. Make the appropriate modifications and reposition the Doors. - Source: Internet
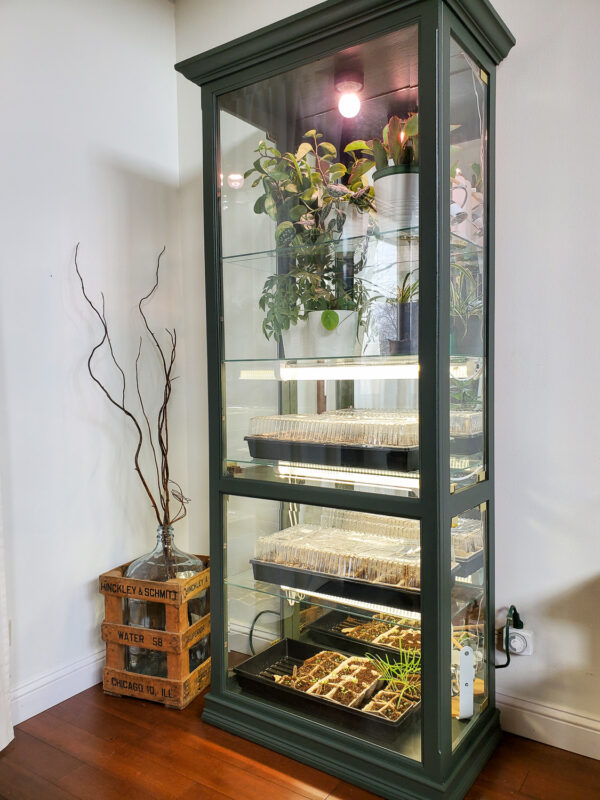
- Before I go any further, let me give you a little context. One of my favourite just-for-fun hobbies is mixing fun cocktails at home and so I have accumulated a decent little glass and barware collection over the past few years. I really wanted to incorporate a beautiful display cabinet into the design of our dining room that could store and display some of these special items. My criteria was that I wanted a piece that had doors and could close (to save me from endless dusting), made a statement (in either style, colour, or both), and didn’t break the bank (remember that I don’t have any existing dining room furniture so it adds up to buy all new pieces). I knew that DIY was the right route to take with this one and I had just the piece to do it with. - Source: Internet
- We are now three weeks in to the One Room Challenge and with almost all of the sub-projects involved in our dining room makeover only started, I feel like I have made very little progress overall. But thankfully I have done my fair share of furniture flips over the past year and so the display cabinet project on my list felt pretty approachable and doable, which is exactly why I decided to tackle it right away. Does anyone else take on the easy things first just so they can feel the satisfaction of having something checked off the to-do list? It turned out even better than I imagined and am excited to show you how I updated an outdated china cabinet to be the modern-traditional display cabinet of my dreams! - Source: Internet
- I knew I wanted the bottom shelf to be taller off the counter top than the other shelves, so that’s why the bottom line is further from the end. The top shelf line is placed where our header will come down to once the shelves are trimmed in. You want this header board to be tall enough for your crown molding (but more on this to come below). This top shelf actually serves as the “ceiling” of the cabinet. - Source: Internet
- The basic corner hutch is a triangle, two sides of which face the wall. Use either lumber or plywood to make the sides of the cabinet, but plywood is the easiest to use. Cut two panels for use as the sides; join them at the back with cleats or 90-degree metal braces. Use this V-shaped case to determine the proper size for the shelves that fit inside; make them flush with the outside front edges of the sides (bevel the edges of the case to create a flat front with the shelves). The top and bottom of the case should be securely attached to the sides. - Source: Internet
- Position the footplates ½-inch from the front and back edges and 2 inches from the ends of the Bottom Board. Drill shallow pilot holes through the plate and into the board. Secure the plates using the screws provided. Twist the threaded rod on each foot into a footplate. Now have a helper lift and set the cabinet on its feet. - Source: Internet
- Of course I drew up some building plans for this buffet cabinet. I’m excited to share the full how-to, including the plans over at BuildSomething.com, which is Kreg’s new building plan site (you know, the Kreg Jig people). - Source: Internet
- A corner hutch (also called a corner curio cabinet) is a great way to gain some useful storage space from a wasted corner. Its unusual shape allows display objects to be clearly seen from almost any angle in the room, something a square cabinet just cannot do. Plus, it takes far less material to build than a square cabinet. A corner hutch can add something special to just about any room. - Source: Internet
- I absolutely LOVE the way this piece of furniture turned out! I love the shape and style of it, and I love the natural look of the dark stained wood. I was really torn on whether I wanted to paint it or stain it, because if you have seen any of the furniture I’ve designed and built- like my coffee table, desk, farmhouse bench– you know I love the white painted wood with a solid dark stained top. But I really loved how my jewelry cabinet looked all stained, and so I went with the all stained look. - Source: Internet
- The circle trim on the buffet doors is really easy, but don’t tell anyone that…let them be impressed by your craftsmanship! Print the template (available at BuildSomething) and trace on a piece of 5 mm underlayment plywood. Use a band saw, jigsaw or scroll saw to cut out the circle trim. Glue and nail the circle trim onto the door panel and you’re done. If you have any gaps between the trim plywood and door panel use a little spackle or wood filler to smooth it out. - Source: Internet
- It’s 12″ deep and 30″ wide. The only downside was that it was also only 30″ tall, just like a standard upper cabinet height. We wanted 36″ tall for a standard counter height. We built a frame on the wall to bring them out an extra few inches and to raise them to counter height. - Source: Internet
- While the footprint of this cabinet is slim, it packs its punch on storage space. Use it as a Sideboard in a dining room, a dresser in the bedroom, or as a storage console near the entryway. No matter the use, you’ll be happy with the clean lines and versatile hideaway spaces. And while we rated this project at a higher difficulty level than most, it’s not necessarily because it requires a higher level of skill, but just that precision is key. But don’t worry, when it comes to positioning and installing the doors and drawers, we’ve got a trick up our sleeve that’ll make you come out looking like a pro! - Source: Internet
 Following are some suggestions for where to begin your search for data on Outdoor Buffet Table Plans:
You should try to find plans for building a buffet cabinet-related information from reputable places. Libraries, online resources, and even paid journalists all fall under this category.
- It's crucial to be aware of the various electronic media sources available when researching Buffet Cabinet- free building plans, such as Google and YouTube. You may also get info about Buffet Table Design For Home on social media sites like Facebook and Twitter.
Following are some suggestions for where to begin your search for data on Outdoor Buffet Table Plans:
You should try to find plans for building a buffet cabinet-related information from reputable places. Libraries, online resources, and even paid journalists all fall under this category.
- It's crucial to be aware of the various electronic media sources available when researching Buffet Cabinet- free building plans, such as Google and YouTube. You may also get info about Buffet Table Design For Home on social media sites like Facebook and Twitter.It’s crucial to read to examine the authenticity of each source in order to acquire the greatest information regarding Buffets, Sideboards and China Cabinets.
Video | Plans For Building A Buffet Cabinet
You’ll learn more about DIY Buffet-Sideboard with Circle Trim Doors after watching the films included in this post, which come from a variety of different sources. Information on a wide range of topics can be easily accessed via the internet.
## Notable features of Diy Buffet Table Makeover include:- Plans For Building A Buffet Cabinet
- Plans For Building A China Cabinet
- Plans For Building A Wood Buffet Cabinet
- Plans For Building A Buffet Table
- Plans To Make A Buffet Cabinet
With the abundance of Simple Buffet Table Design-related resources available online, it’s easy to find what you’re looking for.
This is not how most people would expect to learn more about Long Rustic Modern Buffet Table, so be prepared for some shock value. It paves the way for a closer examination of the Diy Buffet Table Makeover information’s actual substance and its potential applications.
 techniques for making Farmhouse Buffet data visualizations that are both aesthetically pleasing and practically applicable. They can spread the word about Buffet Plans Woodworking Free in professional and promotional settings. For this reason, we also include Build a DIY Sideboard Cabinet-related pictures.
At last, this article sums up key points about Build a DIY Sideboard Cabinet. There is also a comparison of your Diy Farmhouse Buffet Table knowledge to that of Sideboard Plans Woodworking Free, as well as a discussion on Diy Buffet Cabinet Ikea and Diy Buffet Cabinet Ikea.
