Should Shower Tile Grout Be Sealed will be the topic of our conversation on this particular occasion. There is, without a doubt, a great deal of information pertaining to should shower tile grout be sealed available on the internet. As a result of the rapid development of social media, it is now much simpler for us to acquire new information.
There is a connection between the pieces of information pertaining to Grout Sealer Waterproof, How To Seal Shower Grout, and What Type Of Grout Sealer To Use In A Shower. Regarding the other items that need to be searched, one of those things is concerning should bathroom grout be sealed, which will also have something to do with should shower tile grout be sealed.

12 Tips for Should Shower Tile Grout Be Sealed | Does Shower Grout Need To Be Sealed
- Then you’ll just want to repeat this whole sealing thing every six months to a year if you can, just to head off nasty discolored or mildewed grout before it gets a chance to rear its ugly head. It’s just a smidge of maintenance to keep your bathroom looking mint, so we definitely think it’s worth the effort. We’re thinking every year from here on out will work just fine for us. What about you guys? Are you overdue for a grout sealing adventure? Has anyone already sealed theirs and noticed the easier maintenance perk that we’ve mentioned? Dish the grout sealing dirt. - Source: Internet
- So far our initial sealing efforts have definitely paid off. I can proudly admit that I’ve had to scrub the shower grout exactly zero times since we initially sealed everything over five months ago (and I haven’t had to touch the floor grout either). Thanks to that nice impenetrable seal it looks like we actually accomplished the lower maintenance bathroom that we dreamed of- and we didn’t even have to give up white subway tile or the coordinating white grout to do it. Whew. - Source: Internet
- And because we heard from more than a few pros that sealing grout is a great idea around six months after the initial sealing job- we figured we’d take you guys along for the ride in the form of a simple step by step tutorial so you can seal your grout right along with us if you so desire. Of course we should mention that if you start with dirty, cracked, discolored, or mildewed grout, sealing that will do nothing to keep it looking clean (since you’ll just be sealing those flaws in). So you might want to go to town scrubbing the heck out of your grout to get it back to its original glory before taking on this project. And those who are dealing with especially nasty grout can actually dig it out with a grout knife and regrout the whole tub or floor- which you can learn more about here in this post and by asking the experts at your local home improvement center. - Source: Internet
- Once you have your grout nice and clean and dust free, the next step is to whip out your sealant of choice. There are tons of sealants that you can choose from at your local home improvement store, so just read the bottle to see what materials it’s meant for (some will specifically say “for use on marble or granite tile” or “specially formulated for dark tile” so it’s nice to find one that works best with your surface- and you can always ask the experts in the tile area if they have any recommendations if you find yourself standing there scratching your head over all the options). We opted to use this sealer from Home Depot for the white subway tiled walls of our shower/tub since the description sounded perfect for the job: - Source: Internet
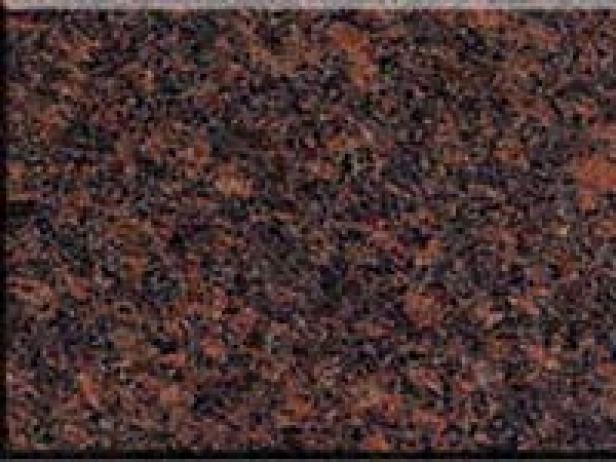
- Then you should decide how you want to apply your sealant. Some people like to just seal their grout with a grout sealant applicator brush (which is sort of like a wire-y nail polish brush that can be traced along a grout line to distribute sealer along that groove. We prefer to rely on the sponge because we have very thin grout lines so we like that it feels a bit more thorough than just tracing each grout line once with an applicator brush- plus it has the added benefit of sealing our tiles while we’re at it (which can also be sealed to keep them more stain resistant and to protect them from moisture penetration as well). In other words by applying our sealant with a sponge we’re sealing entire sections of the bathroom, like the entire tub and shower surround and the entire floor. This is nice because natural stone like marble and granite can be very porous and therefore a lot more prone to staining or damage if they’re left unprotected. - Source: Internet
- Another reason it’s smart to work in smaller sections is because five to ten minutes after you’ve begun to apply your sealant, you’ll have to start wiping it off. Of course we recommend following the specific directions on the sealer that you purchase, but both of ours had a time limit within that range that they recommended as the wait time before wiping. This meant that I could seal one out of the three shower walls (which took about seven minutes) and before I moved onto the second wall I used a dry rag to wipe down that first wall since any excess sealer should be removed within that 5-10 minute range. Then I moved on to the middle wall, which I sealed and then wiped down after around seven, and finally got to my third wall which I also sealed and then wiped down within about seven more minutes. - Source: Internet
- What does sealed grout have over non sealed grout? Well, by not allowing moisture or dirt to penetrate the grout, it relegates these things to the surface, thereby protecting the look of your lines. In other words: white grout stays nice and clean and white. And any other colored grout looks as good as new (all while warding off mildew and other gross stains). And one tip that we heard from several tiling experts was that not only should we thoroughly seal our bathroom’s floor and wall grout two months back when we completed our big bathroom overhaul (learn more about that project here) but that we should go back in and reseal everything about six months afterwards- just to be sure we didn’t miss a thing and that we have a nice thick seal on everything (which can literally be the difference when it comes to having to scrub dirty grout lines to rid them of mold and mildew). - Source: Internet
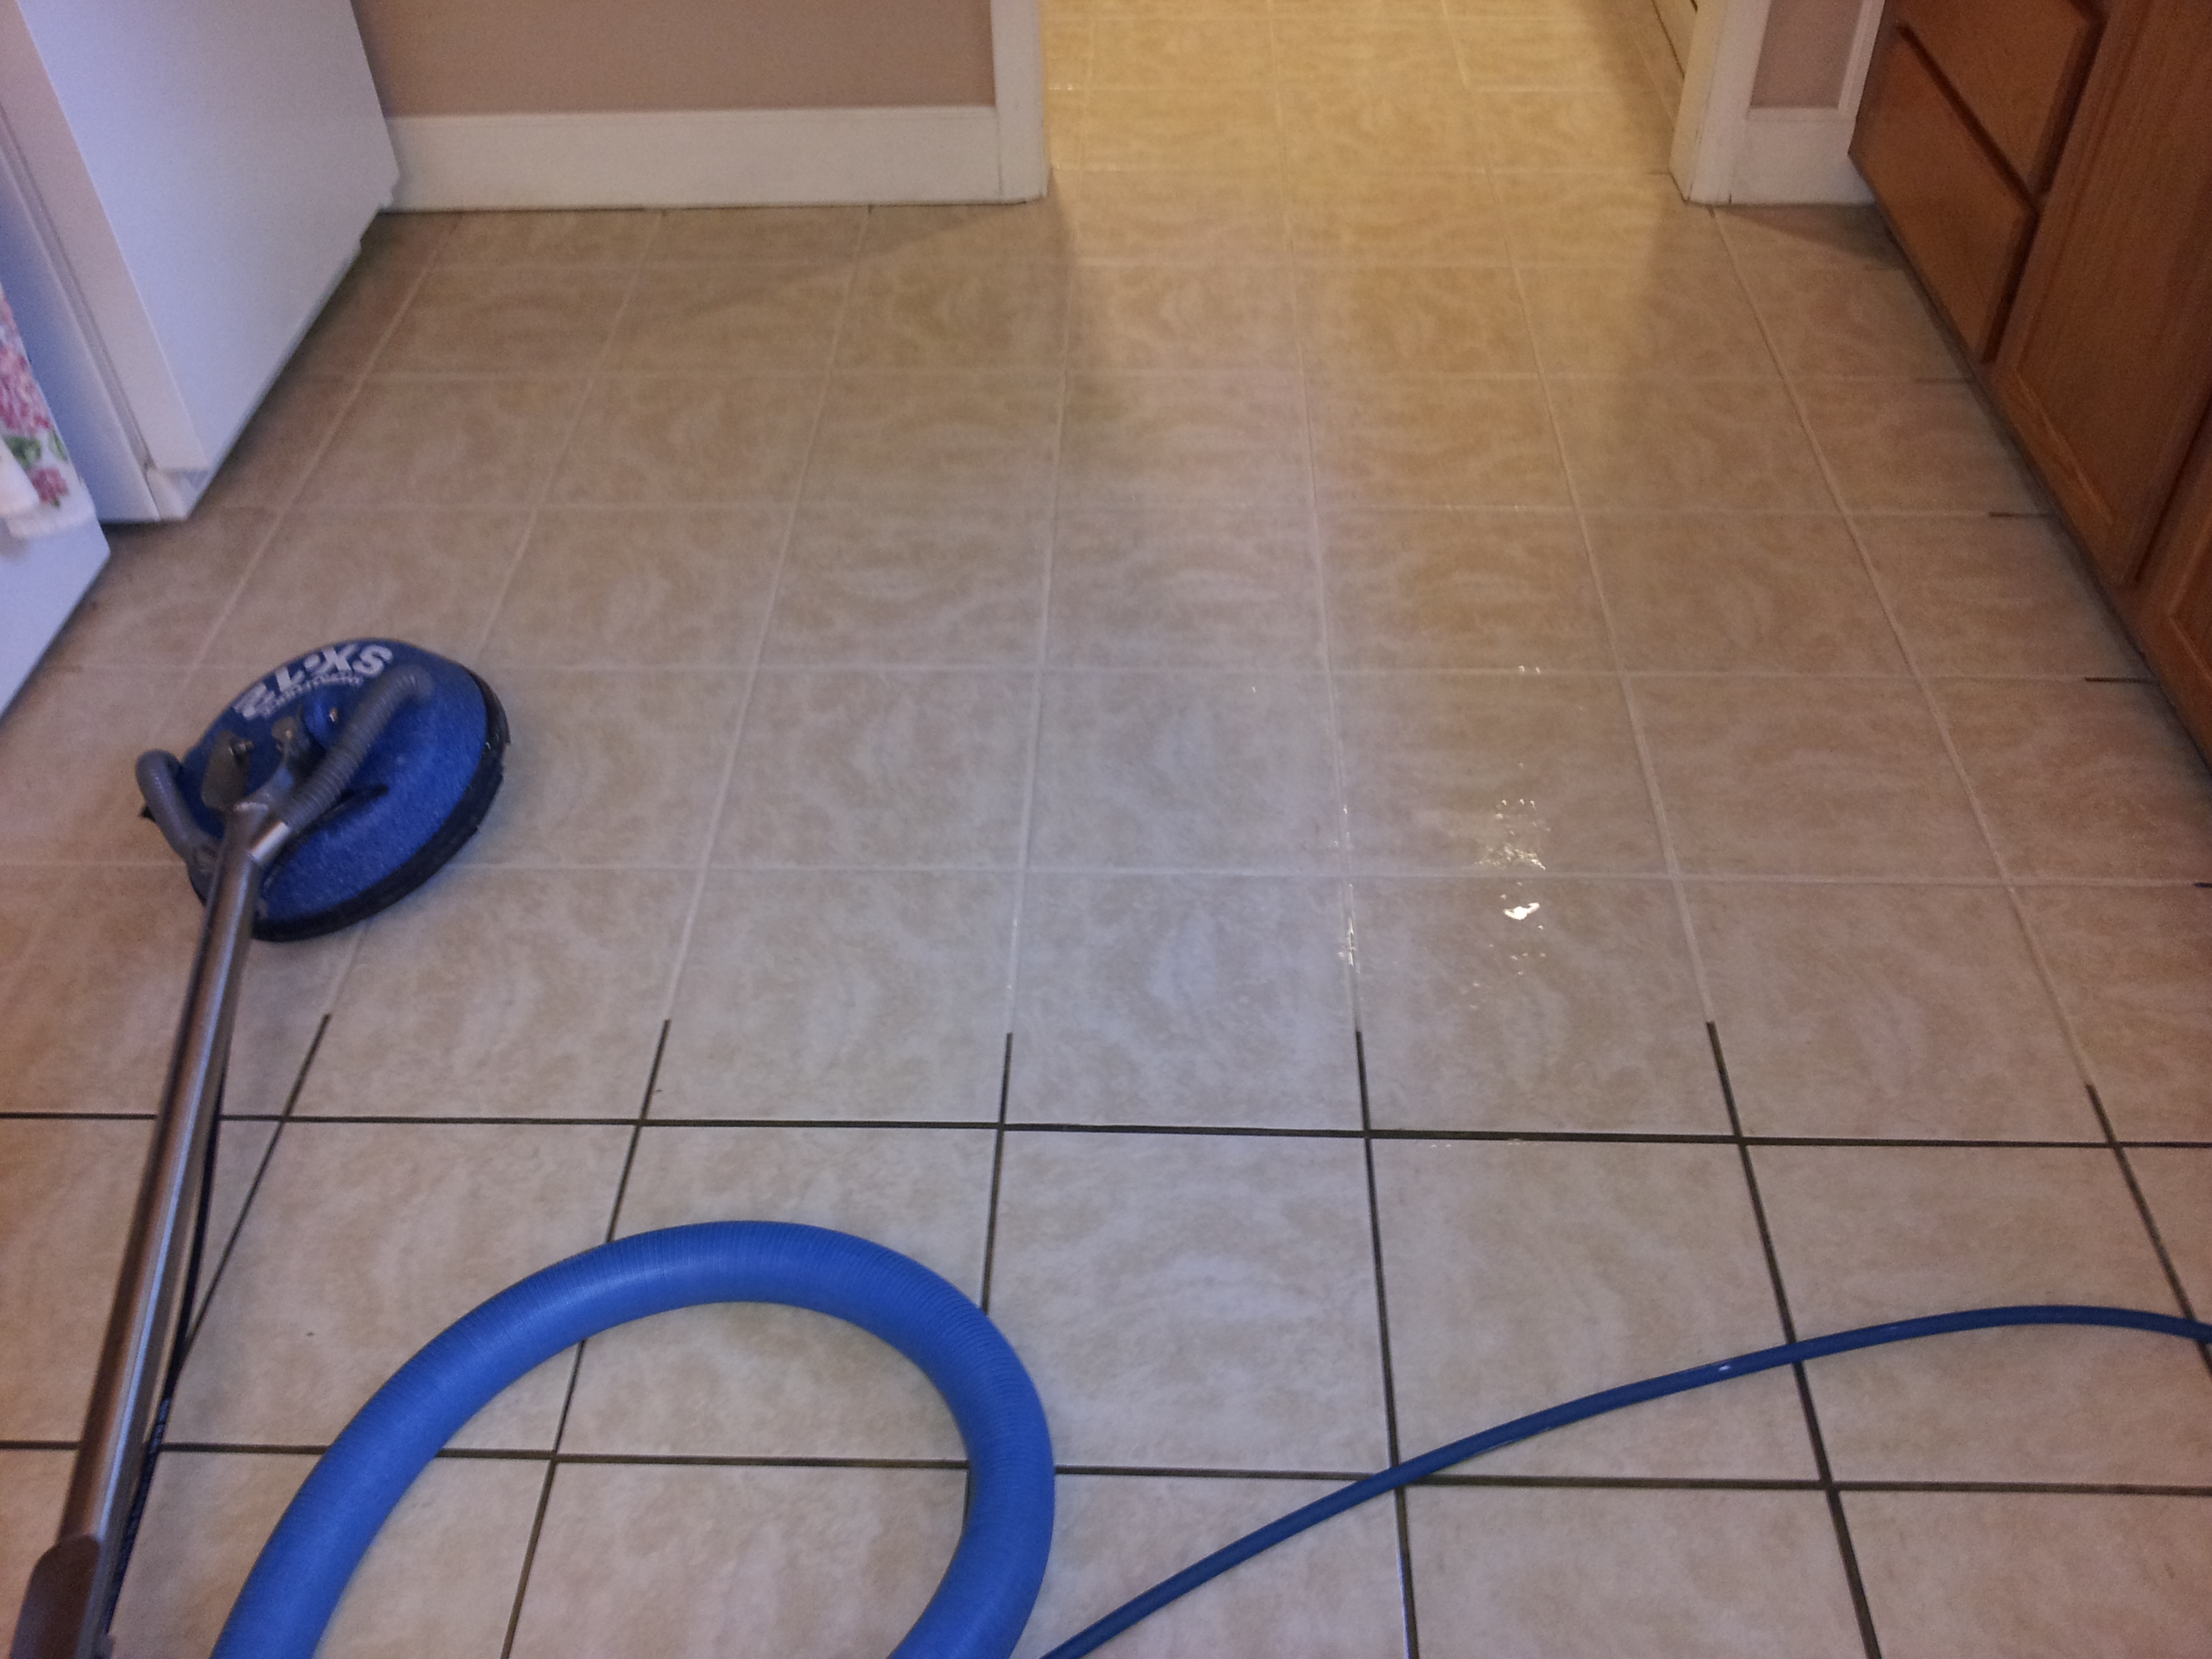
- But back to sealing the deal grout. The first step is to clear the room. That means everything on the floor or the shower walls (or your kitchen backsplash) must be removed so you can seal without worrying about getting it on the shower curtain, the floor mat, or the blender. We even removed our shower caddy to be sure there was not a centimeter of grout that was left inaccessible. So after we tossed a nice little pile of bathroom stuff in the nursery we were well on our way to step two. - Source: Internet
- And when it came to our precious dark marble floor with mocha grout lines, we purchased this specialty sealer from The Tile Shop since it not only said that it works on all surfaces but was specifically formulated for marble (we felt it was safer than relying on something that lists a wide range of materials, only one of which is marble). It was pretty pricey at around $50 (although the special marble sealer at Home Depot was around $40 so it’s not usually cheap stuff anyway), but the box not only included the sealer- it also had a sponge, a grout brush applicator (for anyone with thicker grout lines), and a special cleaner formulated just for marble tiles that keeps them sparkling between annual sealing adventures. Plus we had more than enough for the initial sealing job back in January and still have tons left for touch-ups to keep things nice and protected throughout the years. - Source: Internet
- Then you just leave everything undisturbed for the amount of time that it says on the bottle. Our shower sealant said it needed 48 hours to fully cure before it could get wet (so we strategically applied it on a Friday night when we knew we’d be out of town for the weekend so it wouldn’t cut into our showering time). By contrast our floor sealant only needed 24 hours to fully dry (but could be walked on in just two hours) so be sure to read those labels to see what yours calls for. Either way it should only be a day or two at the most that your room is out of commission, and that’s a small price to pay for months or a full year free of grout scrubbing and mildew battles. - Source: Internet
- The second step is to ensure that the grout (and surrounding tile) that you’re about to seal is clean and dust free. Since our grout was most definitely not stained, cracked, discolored, or mildewed we just ran a microfiber cloth over the surface of the shower walls to grab any spare dust particles that we didn’t want to seal into our sparkly white grout lines. And as for the floor, we did some sweeping to be sure that we picked up every last spec of dust and hair so that surface was also good to go. Again, if your grout is not in stellar condition, this would be the time to clean the heck out of it (note: be sure to read the back of your sealant instructions to see how long the grout must be dry before it’s sealed- aka: don’t scrub your tile and then try to seal it while it’s still soaking wet). - Source: Internet
- Next it’s just time to sponge on that sealer. I prefer to pour small amounts of sealant straight from the bottle onto my sponge by tipping it to get a good splash or two on there. Then I work in small sections to be sure that I don’t lose track of what I’ve sealed and what I haven’t and I apply the sealant in a circular motion, sometimes working back and forth or up and down to get the edges of things. This isn’t exactly a gentle process, you have to apply a good amount of pressure to work the sealant into those cracks. As you go you can subtly see what has been sealed and what hasn’t because the sealed sections of tile should look slightly wet and the grout usually looks a bit darker where it has been saturated. - Source: Internet
 To get you started, here are some pointers to consider when searching for information regarding should shower tile grout be sealed:
- Do some research to find Is It Really Necessary To Seal Grout?-related information from reputable sources. This may include professional journalists, as well as online libraries and other websites.
- When looking for information regarding What Type Of Grout Sealer To Use In A Shower, it is crucial to be aware of the various types of sources that can be found through electronic media. Some examples of these types of sites include Google and YouTube. There is also the possibility of obtaining information about Does Shower Grout Need To Be Sealed from various social media sites, such as Facebook and Twitter. This is another another potential source.
To get you started, here are some pointers to consider when searching for information regarding should shower tile grout be sealed:
- Do some research to find Is It Really Necessary To Seal Grout?-related information from reputable sources. This may include professional journalists, as well as online libraries and other websites.
- When looking for information regarding What Type Of Grout Sealer To Use In A Shower, it is crucial to be aware of the various types of sources that can be found through electronic media. Some examples of these types of sites include Google and YouTube. There is also the possibility of obtaining information about Does Shower Grout Need To Be Sealed from various social media sites, such as Facebook and Twitter. This is another another potential source.Video | Should Shower Tile Grout Be Sealed
Reading and doing research on the authenticity of each source are both essential if you want to discover the greatest information there is about How To Seal A Shower Floor. Your understanding of Does Shower Grout Need To Be Sealed will be improved by watching the many videos on Grout Sealer Waterproof that are included in this page. These films come from a variety of different sources. Finding knowledge on a wide range of subjects is made much simpler by making use of the internet as a resource.
## Here are some crucial points concerning should bathroom tile grout be sealed:- Should Shower Tile Grout Be Sealed
- Should Bathroom Tile Grout Be Sealed
- Should Bathroom Grout Be Sealed
- What Type Of Grout Sealer To Use In A Shower
- How To Seal Shower Grout
You won’t have any trouble finding the information you’re looking for because there are so many websites and forums on the subject of How To Seal A Shower Floor.
When it comes to obtaining information on should bathroom grout be sealed, the majority of individuals are more accustomed to using a different route. It enables a more in-depth look at the information regarding Is It Really Necessary To Seal Grout?’s content and how it may be used, which is really helpful.

strategies to design information displays that are both aesthetically pleasing and functional that pertain to should bathroom tile grout be sealed. They are useful in commercial and marketing settings, and they can also be put to use to convey information on How To Seal A Shower Floor. As a result, we also supply some photos pertaining to Does Shower Grout Need To Be Sealed.
In summary, this article offers a comprehensive analysis of What Type Of Grout Sealer To Use In A Shower. In addition, should bathroom grout be sealed and should bathroom grout be sealed are mentioned here as a comparison of your knowledge regarding Is It Really Necessary To Seal Grout?.
