This time, we’re going to talk about Sanding A Deck With A Palm Sander. There is a lot of information about How To Sand A Deck on the internet, of course. Social media are getting better and better quickly, which makes it easier for us to learn new things.
Tips for Sanding a Wood Deck Before Refinishing and Best Sander For Stripping Deck are also linked to information about Do Not Sand A Deck. As for other things that need to be looked up, they are about Pole Sander For Deck and have something to do with Sanding A Deck With A Belt Sander.

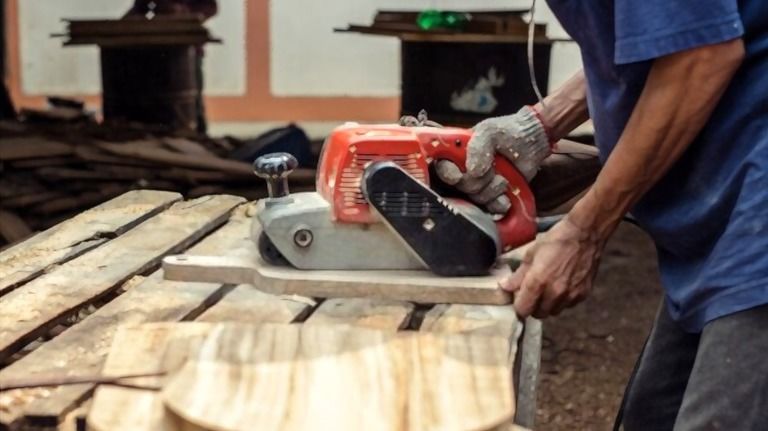
110 Tips for Sanding A Deck With A Palm Sander | Deck Sanding Machine
- No, you should not use a floor sander on an outdoor deck. Floor sanders are specifically designed for use on indoor, wooden floors and should not be used for outdoor decking. They are not made for rough wood surfaces, uneven surfaces or for harsh weather conditions and can easily be damaged when used outdoors. - Source: Internet
- The deck joists will run perpendicular to the deck flooring and will be the main component supporting it. The core concept here is that these perpendicular boards will be secured to the frame using brackets and nails. You can find all of the details you need in our dedicated article. Good news: This is the final step before you install the flooring! - Source: Internet
- This sandpaper is coarse enough to shape wood and remove previous finishes. It works well when used on both hardwood and softwood floors. However, extra care needs to be taken when used with drum sanders as its coarseness can damage the floors. Medium sandpaper: Medium grit sandpaper is ideal for removing stains, mold, and mildew and can also shape materials. Some deck refinishing projects usually start with this grit, especially for frequently sanded decks. - Source: Internet
- We admire your sense of preparation. Here you are, getting ready to refinish your deck and you’re so thorough that you are reading reviews of sanders to get the job started right. At least we hope that’s why you’re here. The alternative is that you’re neck-deep in doing the job and are troubleshooting — as your house burns down — where it all went so very wrong. - Source: Internet
- It’s normal for decks to fade, look bleached, and worn over time, especially due to agents such as sun and rain. To get rid of the unsightly fade marks, you’ll need to sand your deck carefully with the right grit sandpaper. If you’re the type that fancies DIY projects, then it’s necessary to observe some crucial steps to sand your deck successfully. - Source: Internet
- Once you’ve completed the cleaning process, let your deck dry before applying your stain. Staining directly after power washing will trap unwanted moisture in the wood, which may cause issues in the future, especially if you’re using an oil based stain. Using a water-based acrylic stain such as DEFY Extreme Wood Stain will allow you to stain a few hours after cleaning, just make sure the wood is visibly dry. Otherwise, for most other stains you’ll need to allow the wood to dry at least 24 hours. - Source: Internet
- Granted, sanding is the hardest part of the DIY deck refinishing project. However, for your efforts to bear fruits, you’ll need to treat light tasks like cleaning up with the seriousness required. This is because you’ll have an unsightly, non-uniform layer if you apply your finish before removing the piled-up dust and debris. - Source: Internet
- It is easy to be overwhelmed by the number of available options out there when it comes to sanding wood. These vary from commercial upright sanders to everyday orbital sanders. The trick is to use any tool correctly with the wood texture and state of your deck in mind. - Source: Internet
- Next, you will need to thoroughly clean the deck. This can be done with a pressure washer or by scrubbing the deck with a deck cleaner and a stiff brush. Be sure to remove all dirt, grime, and any previous coat of stain before applying a new one. - Source: Internet
- Not all decks are created equally. Some decks have odd-shaped corners and differences in design. If you have detail work, you’re going to want a sander that accommodates it. If you like monotonous looking things, you’ll want a model that delivers speed and power while giving short shrift to versatility. - Source: Internet
- Your deck provides an outdoor gathering place in seasonable weather, but painted deck boards can age and the paint can peel over time, leaving you with a less-than-optimal floor surface. You can sand off the paint and the top layer of wood to reveal fresh-looking decking. After sanding the old paint away, you can repaint or seal the deck boards for a new look. - Source: Internet
- If you have a previously stained deck that is in need of a new coat of stain, the process is relatively simple. First, you will need to determine what type of stain was used on the deck originally. This information can usually be found on the can of stain or on the manufacturer’s website. - Source: Internet
- When it comes to sanding decks, the best type of sander to use is a random orbital sander. This type of sander is ideal for this type of job due to its versatility. It can sand both flat and contoured surfaces without leaving any obvious pattern lines and is gentle enough on surfaces to not cause any damage. - Source: Internet
- Disclaimer: In case you opt to make plank replacements. It’s best advised to buy similar planks to those used in the deck flooring. This will ensure the deck retains a uniform color even after wood replacement. Ideally, the new planks should work well with the type of finish you want to use. - Source: Internet
- This system gives an alert any time you start applying excess pressure, so you’ll never again have to worry about damaging the wood while sanding. Its 6 amps of power make it quite the powerhouse for all your belt sanding needs, and its auto track belt and dust collection unit will make each and every sanding experience so much easier for you. And all of this convenience is at such an affordable price for the quality…what are you waiting for? - Source: Internet
- Of course, not all of your intended deck area is going to be next to concrete. To finish making the frame, you should prepare footings. Homedit suggests a simple method: dig an appropriately sized hole, insert a concrete form, place the lumber piece inside, pour in concrete mix, and let it set. Do this for each footing you’ll need. - Source: Internet
- For these reasons, it is best to use a belt sander, drum sander, palm sander, or orbital sander when sanding a deck. These tools have smaller heads that allow for more precision and better control. Plus, they typically have dust collectors to reduce the amount of dust in the air. - Source: Internet
- After cleaning up (getting rid of any sawdust that might contaminate the surface) I started oiling the deck. I got two coats done that weekend and a third the following week. I used Intergrain Ultradeck in Merbau. - Source: Internet
- The final step is applying your chosen stain. Choosing a stain can be challenging, but we recommend using a semi-transparent stain for a new cedar deck, pressure treated deck, or decks made from hardwoods. It will preserve the natural weathering and character of the wood while offering excellent protection. You can choose a dark stain, like dark walnut, to bring out your wood’s natural grain and texture. - Source: Internet
- Inspect the deck surface for protruding nails or screws. These should be countersunk 2 mm or more so that sanding your deck will go smoothly and your sandpaper won’t end up shredded. - Source: Internet
- When sanding a deck, the first step should be an inspection. Check for protruding screws or nails, loose fastenings, and rotten wood. Once you’ve made repairs, you should wash the deck and allow it to dry. Afterward, use a sander to sand the deck and the edges before cleaning and applying a finish. - Source: Internet
- In interest of making this process as efficient as possible, we’re going to start with the largest sander first: the floor sander. I suggest doing 2-3 passes with the drum along the decking planks using 60 grit sandpaper rolls. Anything beyond that is likely a cupped board that the drum sander can’t reach. - Source: Internet
- As opposed to belt sanders, orbital sanders are ideal for finish work rather than rough work. The orbital sander features a square foot, which makes it perfect for sanding in otherwise hard-to-reach corners or edges. In addition, the orbital sander is known to remove less of the surface material a belt sander would. - Source: Internet
- Yes, it is important to wash the deck after sanding. Sanding removes the top-coat of the deck and exposes the raw wood beneath. To ensure proper protection of the wood, the remaining wood product must be removed. - Source: Internet
- Another important tip to observe when sanding a deck is conducting a practice run in the areas designated for decking furniture. Attach the sandpaper to your preferred sander and try sanding to see if the combination works. Luckily, if you end up making a mistake or opting for higher grit sandpaper, you can easily hide the unsightly marks with deck furniture. - Source: Internet
- Perfect for exterior deck refinishing, The HTF resists damage if sanding over screws or nails and is sized to sand the entire deck surface quickly and beautifully. Ideal for interior medium to light duty floor sanding , refinishing and final sanding of all types of wood flooring. With or against the grain for a score free, superior finish. - Source: Internet
- It is also essential to wear protective gear such as safety masks, glasses, and hearing protectors while sanding. Furthermore, the deck needs to be fully dry before you get started. Now that you are good to go, get those speakers out, grab a few beers, and get started. - Source: Internet
- The best belt sander for deck refinishing is the Makita 9403. It’s just that simple. This one will get up and get after a project, removing whatever you need removed tout suite. It’s fast, powerful and easy to control. - Source: Internet
- Either way, we’ve got valuable stuff for you. We reviewed some sanders for you. We looked at both belt sanders and orbital sanders to give you a nice range in case you are thinking beyond your deck. If the model you’re looking at isn’t one of them, or in case you’re finished picking up the pieces of your shattered life and wondering how to avoid it in the future, we included some insights into how we arrived at our conclusions. - Source: Internet
- Other factors that affect the drying time of a deck include humidity and temperature. But to be on the safe side, it’s highly advisable to give the deck around 24-48 hours to dry. If the weather’s a bit gloomy, don’t hesitate to take more time before returning deck furniture to avoid chipping the coatings. - Source: Internet
- To get started, you’ll first need to prepare the deck by making necessary repairs and cleaning up. Once the surface is ready, pick a coarse enough sandpaper and start working the surfaces. Remember to clean up the dust whenever you switch to high grit sandpaper. - Source: Internet
- As previously mentioned, preparation is important. Make sure you get all the nail heads down well under the timber surface. Replacing the sanding belts gets expensive and can take a while (I was using strips rather than the easier circular ones shown in the video) and obviously you also risk damaging the machine or worse if you hit a nail. - Source: Internet
- Although most people take this step lightly, allowing the deck stain or oil to dry is integral to your refinishing project’s success. The time taken for the stains or oil to dry depends on several factors—on top of the list is the type of decking timber used. You should also check on the manufacturer’s recommendations to determine the ideal drying time. - Source: Internet
- We hope our article helped you get your DIY affairs in order and gave you a better idea of which sander is best for your upcoming project. Any of the products we listed will be a fantastic addition to your tool collection, but you can always keep looking if you haven’t found your perfect match yet. Remember: Taking the time and effort to find the best deck sander for you will pay off big in the end. Good luck! - Source: Internet
- This type of sandpaper is ideal for final sanding right before the project is completed. It leaves the surface neat and soft enough, thus preparing it for the finish. Extra fine sandpaper: Chances are you won’t get to use this sandpaper in your deck sanding project. However, you can still use these soft grit sandpapers to polish your deck and make the surface even smoother. - Source: Internet
- Applying decking oil is an alternative to using decking stains. Since decking oils are available in clear and colored formulations, they can be used to enhance the durability and beauty of deck timbers. Decking oils have high wax and oil concentrations, which help to make the deck surface resistant to dirt ingress and water. - Source: Internet
- Check the weather forecast. The best time for sanding a deck is when you can expect several days without rain. - Source: Internet
- You can expect your deck to show signs of wear to let you know that it’s time for some washing and refinishing. When a deck starts to flake with the surface turning into a grayish color, it’s time for you to set aside a sunny weekend to get the job done. The amount of work that might require depends on the type of finish you used on the deck, and the time that passed since the last time you refinished and sanded it. - Source: Internet
- Choose the right sander. Although a floor sander is great for wood flooring – indoors – it’s not an ideal choice for the rougher, more uneven surface of a deck. Instead, use a belt sander (for large expanses) or a finishing sander (for spot sanding, as well as for corners and edges). - Source: Internet
- Wooden structures require maintenance. There’s a lot of hype surrounding certain types of wood that don’t require much maintenance. However, you are going to need maintenance now and then unless you are Okay with the natural gray that most types of wood turn into overtime. Therefore, structures like decks, fences, and sheds need time and effort if you want them to last and look their best. - Source: Internet
- Pressure-treated lumber has been treated with preservative chemicals and therefore must be handled with special care. It’s possible to sand pressure-treated lumber, but protect yourself with goggles, dust mask, and work gloves. After sanding, wash hands well before handling food. - Source: Internet
- Consider renting a floor sander to get the job done more quickly. If you decide to do it with a sanding block or hand sander, start with a medium-grit and then finish with a fine-grit sandpaper. Don’t use too much pressure or you could cause damage. - Source: Internet
- When working on a DIY floor sanding project, you should always start by preparing the floor. This should be no different when working on your deck. Start by inspecting the entire deck from the upper surface to the edges. - Source: Internet
- Belt sanders are perhaps the most useful tool for deck sanding. They work in a linear fashion to provide a clean finish and work wonders on rough or coarse wood surfaces—like your deck! In addition, belt sanders are known for their versatility. This means that even after your deck sanding project is over, you’ll be able to find other uses for your new belt sander in the future. - Source: Internet
- Medium grit sandpaper is ideal for removing stains, mold, and mildew and can also shape materials. Some deck refinishing projects usually start with this grit, especially for frequently sanded decks. Fine sandpaper: This type of sandpaper is ideal for final sanding right before the project is completed. It leaves the surface neat and soft enough, thus preparing it for the finish. - Source: Internet
- For a properly refinished deck, you’ll need to sand your floor several times. The trick is to transition to finer grits as you progress in your deck sanding project. As a rule of thumb, excessively stained hardwood surfaces need coarse grit sandpapers. - Source: Internet
- Therefore, inspect the deck flooring thoroughly for rotten wood and rusted metal components. Don’t hesitate to replace a couple of planks if they’re rotten or destroyed. The idea is to have the deck as structurally sound as possible before getting started with the sanding. - Source: Internet
- Apply finish coat(s). Heavy-duty stain or specially formulated deck-and-patio paint is recommended for the floor of your deck. The finish should be able to stand up to foot traffic, as well as outdoor furniture and grills being dragged back and forth. - Source: Internet
- An issue that some people have is that their power-washed wood looks darker than it did previously. That’s because deck cleaners contain alkaline soaps that raise the wood’s pH. A wood brightener contains acid that reverses this effect and ensures the wood stays at a neutral pH. - Source: Internet
- The Craftsman 7A 3×21 is a decent sander. We liked it. You can use it to sand down a deck just fine. - Source: Internet
- For best results, sand your deck every 1-2 years. Not sure if you need to sand this spring? Try this quick test. Sprinkle the deck surface with a little water. The liquid should bead; if it’s absorbed, that means now’s the time to give your deck some TLC. - Source: Internet
- Once you’ve got your whole deck sanded, the next step is to give it a proper clean. Pressure washing with an oxygen bleach deck cleaner is an excellent option that removes excess grime, mildew, and oils that can inhibit deck stain absorption. Any deck stained without proper cleaning will have an uneven finish due to these minuscule imperfections. - Source: Internet
- The state of your deck’s timber is also important to assess. If they are weathered, the edges can start to split. Any boards that are damaged with sharp edges or splinters should be replaced before commencing sanding. - Source: Internet
- Depending on your preferences and where exactly your deck will be built, you can make a concrete-mounted frame. Essentially, this means that you’ll secure the frame right onto the concrete of your existing steps and along the side of your house. This can be done using a rotary hammer drill and just a few other tools. See Homedit’s dedicated project page to learn the specifics! - Source: Internet
- Once you are done, repeat the process with the lighter grit, which is 80. Make sure that the surface is even as you go. Remember not to go for finer grits since they close down pores which will decrease the wood’s ability to absorb sealer and stain. Now your deck should be ready for sealing and staining. Vacuum the wood deck to move on to the next step. - Source: Internet
- Once the deck is clean, you’ll need to sand it down to bare wood. This will help to create a smooth surface for the new finish to adhere to. Be sure to use a coarse-grit sandpaper so that you don’t damage the wood. - Source: Internet
- Wash your deck. Scrub with a deck cleaning solution. Pressure wash if the deck is very soiled. Then allow to dry completely, for 24 hours or more. - Source: Internet
- After staining your deck, wait a minimum of 4 hours before walking on it and 24-48 hours before putting your deck furniture in place (if the weather is clear and dry, otherwise give it more time). Post-paint, keep heavy furniture off it for a week. - Source: Internet
- For that reason alone, because you are primarily concerned with sanding a deck, we have to downrank this. We didn’t like it, but there it is. Hold a grudge if you absolutely must. - Source: Internet
- We’ll start with the question of whether this is good to sand down a deck. Yes. Yes it can. It has the muscle and durability for a deck. You can pay for better, faster performance, but if it’s just a matter of whether this can do the job it’s not absolutely necessary. - Source: Internet
- In some cases, yes. Direct sunlight and UV rays damage lignin, the glue that holds wood fibers together. As your deck ages, it will become more porous and less water-resistant, which can lead to a host of water damage and mildew issues. - Source: Internet
- This type of sandpaper is ideal for deep sanding projects with a lot of stains, surface roughness, and dirt buildup. This grit is ideal for sanding old deck floors, especially if you haven’t sanded for years. Coarse sandpaper: This sandpaper is coarse enough to shape wood and remove previous finishes. It works well when used on both hardwood and softwood floors. However, extra care needs to be taken when used with drum sanders as its coarseness can damage the floors. - Source: Internet
- Author’s Bio: Rae has a passion for woodwork in general. She has worked on a few wood decks in her life, belonging to her brother as well as his friends. She spends a lot of time working with wood while sharing her experiences with other woodwork and DIY crafts enthusiasts. - Source: Internet
- In preparation for hiring a floor sander I purchased an orbital sander and sanded back the edge around the perimeter of the deck with 40 grit paper. With our cedar battens (railings) it was clear that the floor sander wasn’t going to be able to get into the corners and along the edge of the deck. It’s hard work on the hands and knees but I was happy with the initial results, giving me confidence that the deck was going to come up well after the job was complete. Here’s a rough example: - Source: Internet
- Your wood deck needs to be completely dry before you start sanding. If it was exposed to rain, you would need to wait a few days before you start the sanding work. Furthermore, you need to ensure that any fillers you used are also dry. Finally, clean the dry deck with a broom to remove all the debris. - Source: Internet
- Sanding a deck board is a relatively simple process, but sanding railings and board sides can be tricky. We recommend either using a detail sander or hand-held sandpaper to do the job. Make sure to choose the right grit for your wood type – harder woods require coarser grit than soft woods. - Source: Internet
- Alrighty. You now have all the information you need to build a deck, know which types of sanders are best for sanding it down, and are aware of what factors to consider before making a purchase. That means you’re ready to dive in and see our top picks! - Source: Internet
- It should come as no surprise that BLACK+DECKER has created such a user-friendly sander. Its Mouse Detail Sander, featuring 1.2 amps of power and 1400 orbits per minute, is perfect for small sanding projects or detail work. Its compact and lightweight design further adds to its ability to provide a nice finish, as it’s comfortable to use and can reach those hard-to-get-to corners with ease. - Source: Internet
- You may wonder how much sanding before painting wood is required. Your goal should end up with the smoothest surface without damaging the wood. However, it would help if you stuck to sandpapers with lighter grits such as 60 or 80. Start with a belt sander with the more massive belt (60 or 50) followed by a palm sander to reach the areas that the belt sander wasn’t able to reach. Then use a sanding sponge to smoothen the areas that previous tools couldn’t. - Source: Internet
- Once the deck is clean, you can begin applying the new stain. It is best to do this on a calm day with little wind so that the stain will not dry too quickly or be blown away. Start by apply the stain to the edges of the deck and then work your way in. - Source: Internet
- Using the concrete-mounted frame and footings, you’ll begin building the deck frame. This is a complex process with many steps, but the gist is that you’ll end up with pieces of lumber extending from one end of the framing to the other. These lumber pieces will be fastened in key areas to shorter lumber pieces, which will be positioned vertically to hold the actual floor. - Source: Internet
- It depends on the age of the deck. If you’re certain that the wood is newer than 2003, then you should be safe. However, you can also request a carpenter or decking professional to investigate for the presence of arsenic before you continue. - Source: Internet
- Next, apply deck cleaner or wood brightener to help bring the wood back to life. Make sure you never use bleach or a pressure washer—both can cause serious damage to the wood. - Source: Internet
- Believe it or not, spring is on the way and summer is right on its heels. That means fresh, breezy mornings, delightful afternoons filled with family fun, and long evenings that draw on till eight or nine p.m. in the company of friends and loved ones. What better way to savor the coming seasons and entertain guests than with a brand-new deck? - Source: Internet
- All decks are different. This is the order we would sand a cedar deck if it was flat with no trim, and perhaps a skirt. If your deck has any vertical areas (railing, posts, pergola, privacy wall / fence, etc.) you may want to sand those areas first and then do the floor last. - Source: Internet
- After the decking is evenly sanded, sweep or wipe off the surface to ensure the pores of the wood are not clogged with oily saw dust. If you are sanding the entire surface of a deck, you need to pressure wash the entire area prior to finishing. Once your surface is fully prepared, now you are ready to apply deck oil. - Source: Internet
- What didn’t we like about it? The cost. It’s probably priced out of the range of anyone who is shopping on a budget. If you’re a professional, the cost is acceptable. If you’re a weekend warrior who just happens to need to sand a deck for refinishing this one time, you can get close to the Makita 9403’s performance at a much lower cost. - Source: Internet
- Next, use a sander to sand off any old paint, sealant, and other debris from the surface. This step will ensure that the new paint or sealant adheres to the surface more easily. Once the sanding is complete, you can apply a coat of waterproof sealant or deck paint to make the deck look brand new again. - Source: Internet
- After the stain has been applied, you will need to let it dry. Depending on the type of stain and the weather conditions, this can take anywhere from a few hours to a few days. Once the stain is dry, you can enjoy your newly refreshed deck!. - Source: Internet
- Check out the AdvantageLumber.com channel for more how-to videos and visit AdvantageLumber.com for all your hardwood decking needs. - Source: Internet
- You can either use a handheld orbital sander, a belt sander, or sand the deck by hand. When sanding by hand, be sure to sand in the direction of the wood grain. However, if you’re using a power sander, you should sand in both the direction of the grain and across the grain. - Source: Internet
- It’s also quiet. And heavy. Normally, we’d downrank a tool so much heavier than the competition, but weight in a deck sander isn’t necessarily a bad thing because it aids the user in keeping the thing under control. It’s built like a tank and quiet like a ninja. - Source: Internet
- After you’re done making the necessary repairs, it’s time to give your deck a thorough cleaning. Ideally, you should use cleaning solutions that suit the type of wood used in your deck. Some of the materials you’ll need include a bucket, cleaning solution, a brush (with an extension pole). - Source: Internet
- The fastest way to sand a deck is to use an orbital sander. These sanders use sanding pads that spin in a circular motion, removing material more quickly than manual sanders. Additionally, the sanding pads come in various grits, allowing for a great deal of control over the finish from course sanding to a glass-like smoothness. - Source: Internet
- Thoroughly rinse the wood with a garden hose, let it dry for a day, and then use a paint roller, brush, or pad to apply deck sealer or stain. Let the coat of sealer or stain dry for at least 24 hours before applying a second coat. - Source: Internet
- You might have to apply painter’s tape to nearby surfaces like sidings to protect them from the stain. Using a natural bristle brush to apply the deck stain is highly recommended. While a roller might help to apply stain faster across a larger surface area, brushing is more effective in forcing the stain into pores and open grain. - Source: Internet
- While this is a time-consuming task and requires some attention to detail (and a whole lot of patience), it’s absolutely worth every second and penny spent. To keep things simple for the sake of this article, here’s a quick breakdown of how to make your very own deck. Feel free to click on the provided links to learn more about how each step works. - Source: Internet
- Washing the deck with a power washer or by manually scrubbing with a cloth and mild detergent can do this. Doing so will also remove any potentially hazardous dust particles caused by sanding. After the deck has been washed, it should be sealed to further protect it from the elements and to make it look its best. - Source: Internet
- Decide whether to DIY. Plan on a couple of weekends for this time-consuming (but rewarding) task. If you’d rather spend your spare time relaxing, find a reliable local carpenter to take care of the sanding and refinishing process. - Source: Internet
- Go with the grain and be really slow and cautious when “dropping” the sander onto the wood. I found it to be the only time you risked sanding unevenly and gouging out a trench. The model I hired didn’t have a lever to drop the drum like in the video - this would have been very helpful. - Source: Internet
- Random orbit sanders are known for their round shape and the random oscillating motion they use to remove wood. This type of sander has a lot to offer: more material removal than orbit sanders but less than belt sanders, less impact on the wood grain, and a more user-friendly design. However, they tend to be more expensive than their orbital cousins, and they are not ideal for sanding corners or edges. - Source: Internet
- Remove sanding dust. Clear off all dust from sanding before applying finish. Use a vacuum cleaner, followed by a tack cloth (a cleaning cloth which contains a light adhesive to trap small particles such as sanding dust). - Source: Internet
- Granted, the deck boards should be clean and dry before you apply the stain. However, it’s crucial to check the weather patterns as sanding on a rainy day is not a good idea. Try as much as possible to avoid staining in direct sunlight since it can lead to uneven color and brush marks due to quick drying. - Source: Internet
- The HTF’s abrasive pad, used as a backing pad for the self adhesive abrasive papers, features a unique foam core which prevents the pad from going flat. By retaining its flexibility, the abrasive pad follows the contours of the floor surface without cutting through high spots to new wood. Essential for refinishing and screen and re-coat jobs. The abrasive pad is also a fine abrasive when used on its own equivalent to a 280 grit (P280) abrasive, ideal for sanding between coats of varnish for the very best finish. - Source: Internet
- Ideally, the sander you choose should depend on the size of your deck. Large sanders like drum and belt sanders are ideal for large decks due to their surface area. Either way, you might find yourself switching between sanders as you continue with the project. - Source: Internet
- No, you should not sand a deck with a drywall sander. The head of a drywall sander is too large and it spins too quickly, making it difficult to control and easy to gouge and damage the wood. Additionally, drywall sanders have a tendency to kick up more dust, which can be hazardous for you and for your deck. - Source: Internet
- Getting a decent belt sander doesn’t mean emptying out your bank account. You can get decent quality at a pretty reasonable price, especially if deck sanding is all you’re going to do with it. Skil’s 7510-01 is a great example of a tool that’ll get the job done and make the most of the dollars you spend. Or you can open up your checking account and pay the premium price for the Makita 9403. Sometimes we’d suggest looking in the middle to match quality and price, but we found that the middle ground on sanders doesn’t offer great value. - Source: Internet
- This is no general tool review, where we tell you that an honest appraisal of what you need it for is your first step. We’ve established that you need a sander for your deck. So, the question becomes: what, honestly, do you need this for? - Source: Internet
- Choose the right sandpaper. This depends on the kind of wood your deck’s built from (see “Types of Deck Wood” below). Only go up to 60/80 grit sandpaper maximum, since you want the surface to be smoother, but not so smooth that it interferes with absorption of your finish. - Source: Internet
- Most transparent finishes should give you around two years. Semi-transparent finishes usually contain a stain that blocks ultraviolet rays. Therefore, they won’t need refinishing for four to five years. Furthermore, the more frequently you maintain a wood deck, the more longevity you will be able to enjoy. - Source: Internet
- Survey says that sanding…kinda sucks. But you can make your deck sanding experience just a tiny bit better by opting for a sander that’s comfortable to use. Make sure the product you purchase is relatively light in weight, features a user-friendly design, and has other comfortable amenities such as an ergonomic grip. Emotionally, you might be ready to kick the bucket by the time you’re done sanding—but your hands and muscles will feel great. - Source: Internet
- Sanding wood, primarily wooden decks can be a tiring process. It is essential to make sure that you cover all the areas while repairing any damages so that your deck will look its best for the longest time possible. Furthermore, it is essential to start sealing and staining with your preferred choice of UV-blocking varnish, transparent, or semi-transparent stain. - Source: Internet
- Summer is almost here, and with it, a whole new lineup of household chores. Even if you dread the infamous “honey-do” list, there’s a sweet side to it, though. Home maintenance in the spring paves the way to outdoor fun later. With that worthy goal in mind, here’s our guide to sanding your deck. - Source: Internet
- Depending on your stain, you may have to wait a day or so before using your deck – more if you’ve had bad weather. Oil-based stains tend to take two days to dry, while acrylics will dry more rapidly. Be sure to read the instructions on the label for an estimate of drying times. - Source: Internet
- Simple operation and safety are major features of the HTF. A powerful vacuum system picks up the fine dust created in orbital sanding, which is collected in a disposable paper dust bag for safe handling and disposal. A biased off switch prevents the sander being accidentally left switched on, while the handle is easily removed for easy, safe transportation. - Source: Internet
- After the deck is sanded, you’ll need to apply a primer. This will help to protect the wood and ensure that the new finish lasts for a long time. Once the primer is dry, you can begin to apply the new finish. - Source: Internet
- These tools, compared to more powerful options, require some patience, time, and in most cases, plenty of elbow grease. Most wooden decks are built using softwood types. Power tools that have a rougher grit can gouge the wood and damage it. Therefore, you will be better off with orbital or oscillating sanders when sanding wooden decks. - Source: Internet
- Before starting, be sure to have the correct sanding pads for the type of finish you desire. When sanding, use a medium pressure and move the sander in an overlapping pattern. This will ensure that you cover the entire surface and remove any dirt, residue, or splinters. - Source: Internet
- Refinishing a wooden deck starts with power washing. You will see that the wooden deck’s power washing results in the expansion of wood fibers with water. It may result in the appearance of splinters too. Therefore, it is a must to smoothen the surface while removing old material by sanding wood before you recoat a wood deck. - Source: Internet
- Sanding, by nature, produces a lot of dust. One way you can avoid a huge sawdust mess is to purchase a sander that has a dust collection unit built in. The unit will collect a good amount of the dust while sanding so there’s less of the stuff floating around in the air (which is a health hazard, by the way!). - Source: Internet
 Here are a few tips to help you find information about What Grit Sandpaper For Deck Sanding:
- Look for good places to get information about Common Issues when Sanding a Deck and How to Solve Them. This can be done in libraries, on websites, or even by paid journalists.
- When looking for information about Ensure Your Deck is Smooth with the Right Sander, it's important to know that there are different kinds of online sources, like Google and YouTube. Social media sites like Facebook and Twitter are also good places to look for information about Drum Or Orbital Sander For Deck.
Here are a few tips to help you find information about What Grit Sandpaper For Deck Sanding:
- Look for good places to get information about Common Issues when Sanding a Deck and How to Solve Them. This can be done in libraries, on websites, or even by paid journalists.
- When looking for information about Ensure Your Deck is Smooth with the Right Sander, it's important to know that there are different kinds of online sources, like Google and YouTube. Social media sites like Facebook and Twitter are also good places to look for information about Drum Or Orbital Sander For Deck.Video | Sanding A Deck With A Palm Sander
To get the best information about Best Sander for Deck. Refinish Decks Easily., you should read to find out how true each source is.
This article has a few videos from different places about Best Sander For Deck that will help you learn more about it. The Internet is a great place to find out about a wide range of things.
## Here are some crucial points concerning Sanding A Painted Deck:- Sanding A Deck With A Palm Sander
- Sanding A Deck With A Orbital Sander
- How To Sand A Deck With A Hand Sander
- Can You Sand A Deck With A Palm Sander
- Sanding A Deck With Orbital Floor Sander
With so many websites and forums that talk about Sanding A Deck With A Belt Sander, it shouldn’t be hard to find what you need.
Most people are used to getting information about How To Sand a Deck in a very different way than this. It lets you look at the information about Best Sander For Stripping Deck and how it can be used in more detail.
 ways to put information about How To Sand A Deck in a way that looks good and is useful. They can be used in business and marketing, and they can also be used to talk about What Grit Sandpaper For Deck Sanding. So, we also give you some pictures about Common Issues when Sanding a Deck and How to Solve Them.
In the end, this article gives a summary of The Complete Guide to Sanding Your Deck. Also talked about are Sanding A Painted Deck and how to sand a deck with a hand sander, which you can use to compare how much you know about How To Sand A Deck.
